Burlap Projects
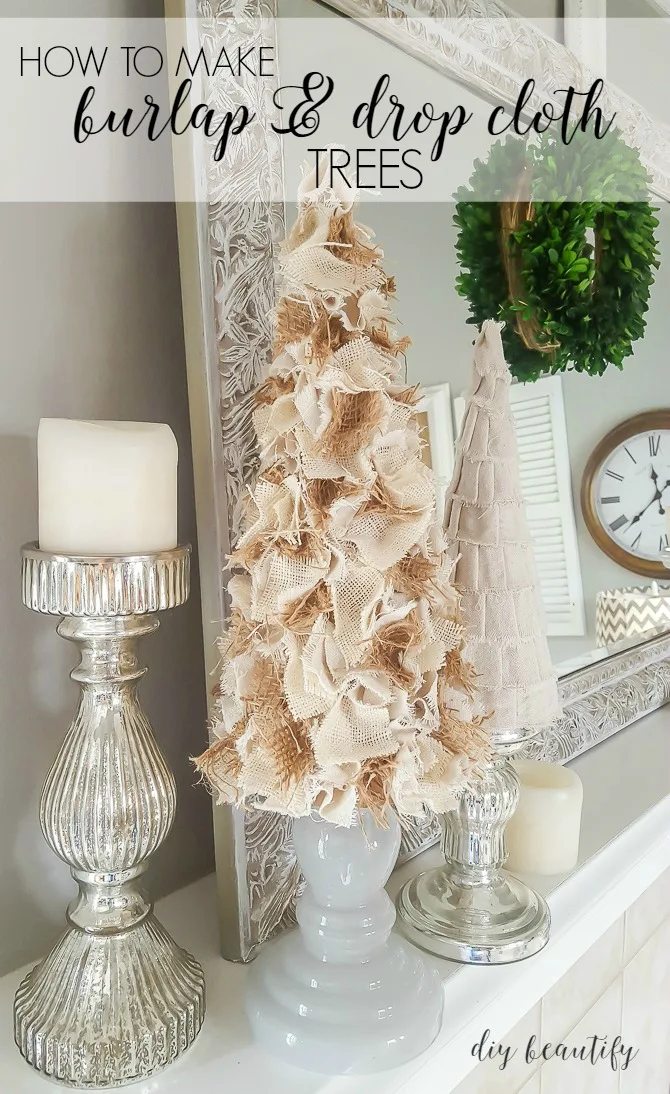
Burlap and canvas drop cloth squares are combined to make a neutral DIY tree, and burlap fabric is stenciled to create large DIY wall art for the home.
Updated 02/2023
Burlap is a fun and inexpensive fabric to decorate your home! I decided
to create a mixed burlap tree that could fit into any season because of its
neutral color scheme. While I was cutting my burlap squares, I decided to add
some drop cloth material to the mix. I'm really happy with the mix of textures
and colors.
Wanna make one yourself? Here's how.
Wanna make one yourself? Here's how.
How to make a burlap and drop cloth tree
If you can cut and hot glue, you can make this easy DIY burlap tree, it's that easy!Supplies
- paper mache cone
- 2" squares of burlap fabric and/or drop cloth canvas
- hot glue gun
- pencil with a flat end
Cut fabric squares
Do yourself a favor and get the cutting out of the way because it's not fun!
Make separate piles of your fabric. Once you have a decent amount of
squares cut, start your glue gun heating.
Glue square to cone
Starting at the bottom of the cone, insert a pencil end into the middle of a
fabric square as shown, add a drop of hot glue and attach it to the cone.
Continue to add squares to your cone, mixing the materials and the pattern.
Glue them tightly together for fullness. Alternate burlap and drop cloth for a
unique look.
Tips:
- Don't worry about fabric fraying, it will happen! I think it adds to the charm of this DIY neutral tree!
- I opted not to add in a straight line but varied my pattern so it would be more pleasing to the eye when it was complete. Once I got to the top, I went back and filled in any bare looking spots.
I love the fullness of this DIY tree!
This burlap and drop cloth tree looks fabulous on my neutral mantle.
Did you notice the smaller tree, the pleated drop cloth tree? I made that
today as well.
Isn't it totally adorable? I just hot-glued strips of drop cloth in a
clockwise pattern around a smaller paper mache cone, gluing little pleats into
place as I went.
I'm loving how it turned out!
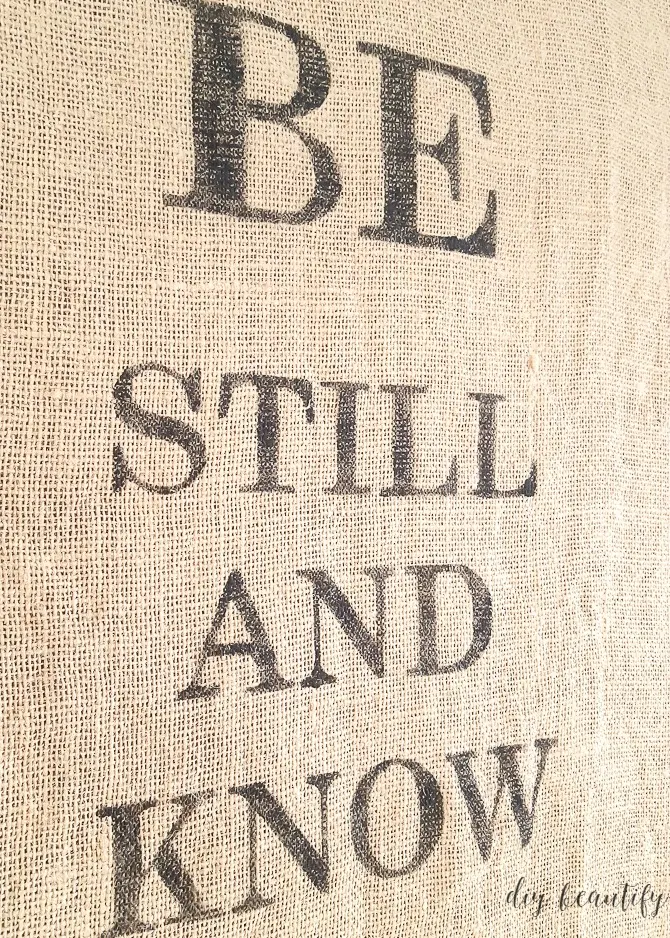
The other BIG burlap piece that I haven't mentioned yet, but you've probably
seen on the blog before is my large 'Be Still And Know' sign.
It started, as many of my projects do, with a thrift find. In this case, it
was a large frame that was empty when I bought it. I painted it and decided to
make a large, meaningful sign for my home. Mr DIY cut a piece of 1/4" plywood
to size and I wrapped it with burlap fabric and then used my
heavy duty staple gun
to adhere it into place in the frame.
I chose a part of Psalm 46:10 to feature on my DIY wall art, that says, Be still and know that I am God. It is a reminder to me that no matter what is going on in my life, I can remember that God has my back. I can slow down, stop worrying and fretting and trust Him. He hasn't let me down yet!
Putting this DIY sign in a prominent place in my home is a visual reminder to
me, my family and my guests that I believe God is bigger than my problems.
I made a DIY stencil out of vinyl using my
Cricut cutting machine and then simply painted the verse on using black
acrylic paint.
I love the contrast of the white frame, the texture of the burlap and the
black paint.
If you love using burlap to make home decor, be sure to check out these other
burlap project posts:

|
| 10 Fabulous Burlap Projects |

|
| Burlap and Lace Jars |
Thanks for stopping by, friends!


That's a lovely mantle!
ReplyDeleteThank you.
DeleteI love the mantle it looks perfect in neutral. I'm going to try the first tree you showed it's adorable.
ReplyDeleteWhy thank you Di! I find the neutral so calming...and I so need that in my life right now :) I hope you try the tree, it's easy, just a little time-consuming (a couple hours..but you certainly don't need to do it all in one stretch!). Thanks for your kind comments!
DeleteThat is gorgeous!!! Thanks for sharing on DIY Sunday Showcase!!
ReplyDeleteShelly
minettesmaze.blogspot.com
Thanks so much!
DeleteI love this! So beautiful and your Christmas Tree is so perfect-
ReplyDeleteYour newest follower too!
Hugs,
Jemma
Thanks so much Jemma, not only for the lovely comment but for the follow as well :)
DeleteGorgeous! I love burlap and make purses out of it. Mantle is stunning. New Follower on Bloglovin!
ReplyDeletewww.threedawgladydesigns.blogspot.com
YAY, I love burlap too, and new followers are just awesome! Thanks for the blog love :)
DeleteWow! I just love the burlap trees and the "Be Still and Know" burlap print. I think you have inspired me to make some of my own! I found you on the Work It Wednesday link party--glad I did!
ReplyDelete-Tasha (Designer Trapped in a Lawyer's Body- www.trappeddesigner.blogspot.com)
Yes Tasha, you should totally do it! Burlap is so cheap and fun to work with & I love the texture it gives! Don't discount drop cloth either though!! Super cheap, but when washed, oh my...like heavy cotton duck and perfect for curtains, slipcovers, or any project really :) Thanks so much for commenting!
DeleteI love both trees! Thanks for sharing....Oh my I have so many projects in my mind and can only get so many done. It is overwhelming......check out my blog..simplebutfabulous.blogspot.com Thanks!
ReplyDeleteThanks so much Melinda! I know what you mean...I have a million projects on the go as well! Looking forward to checking your blog out :)
DeleteThis is super cute! I am so excited because I have a bunch of left over burlap from a previous project and now I know what I can do with it! Thanks for sharing this!! :)
ReplyDeleteThanks Brittany. I keep all my scraps too..until inspiration strikes :) Glad I could inspire you and I would love it if you'd come back and link up your tree when you're done...I'd love to see it :) Happy crafting!
DeleteWow, I could totally see picking up these at the store. They're so polished and so pretty. Excellent job!
ReplyDeleteWhy thank you so much, what a lovely compliment! And I just used scraps...so they didn't cost a dime :)
DeleteBeautiful projects!
ReplyDeleteThank you Sandy :)
DeleteHi I love your burlap Christmas trees! They look like they were a lot of work and you did a great job. I saw it on DIY showcase party. Julie at julieslifestyle.blogspot.com
ReplyDeleteThanks Julie, they weren't too bad...about 2 hours total...Thanks for stopping by; I appreciate the sweet comment :)
DeleteThese look so great! I have had a bit of obsession with burlap lately and have yards of off white left....hmmmm....I see a tree in my future! Thanks!
ReplyDeleteJenna
I know what you mean...I have more burlap projects in my head :) Hope you enjoy making your tree! A white one will be very pretty.
DeleteLove it!! Think I might try one tonight! I have everything on hand. For once, a project I don't have to scramble to find supplies! Pinning, love it.
ReplyDeleteI'm so glad! I would love to see the completed tree :) Thanks so much for stopping by and leaving a comment!
DeleteI love your little burlap and dropcloth tree! In fact, I love everything about your Christmas vignette. Beautiful! So glad I found you over at BeBetsy's party. Thanks for the great tutorial. Pinned and sent on to other crafty friends :)
ReplyDeleteBlessings,
Patti
Thank you so much Patti, I'm glad you found me too :) I hope you're able to use the tutorial; so happy you pinned and sent onward :)
DeleteI've been doing the same thing!! Come over and see my burlap projects! Loving them! Love your trees, and I vote for the mantel also. Your sign is lovely!
ReplyDeleteThank you for all the lovely comments Kathy! I can't wait to visit your blog and see your projects too...
DeleteWhat a great tutorial. I am going to give it a try! Thank you for sharing.
ReplyDeleteHey Susie, I hope you try it, it's not really hard, just a little time consuming...give yourself an evening, put on some Christmas music and have at it :) Thanks so much for visiting and for leaving your sweet comments :)
DeleteYou're on a roll! This was a popular project at last week's Pin Junkie link party and it's being featured this week. Hope you can stop by to grab a featured button at http://www.thepinjunkie.com/2013/11/friday-link-party-44.html Thanks for sharing this very pretty and thrifty project!
ReplyDelete